To add a new nickname for a person, open TMG, go to that person's Person View (hit CTRL-i or click on the Go To icon ), type in the person's ID number and hit OK.
Click on F4 to display the Tag Type List, scroll down and double-click on Name-Nick.
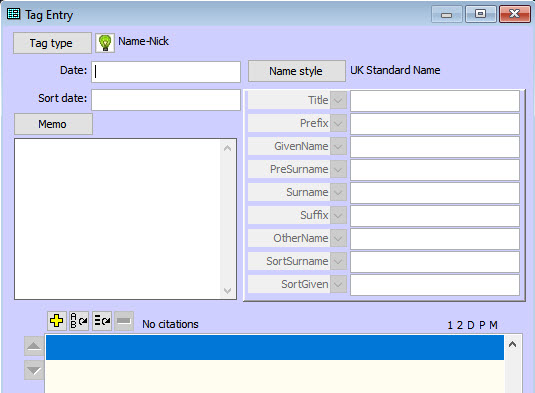
In the Name Tag Entry Window that appears, enter the nickname in the Given Name field and then hit OK.
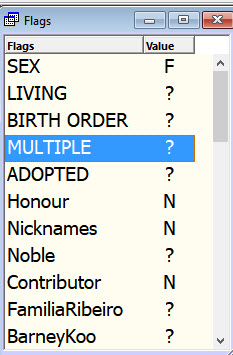
In the Flags window, click on Nicknames; in the Edit Flag window that appears, click on Y and then on OK.
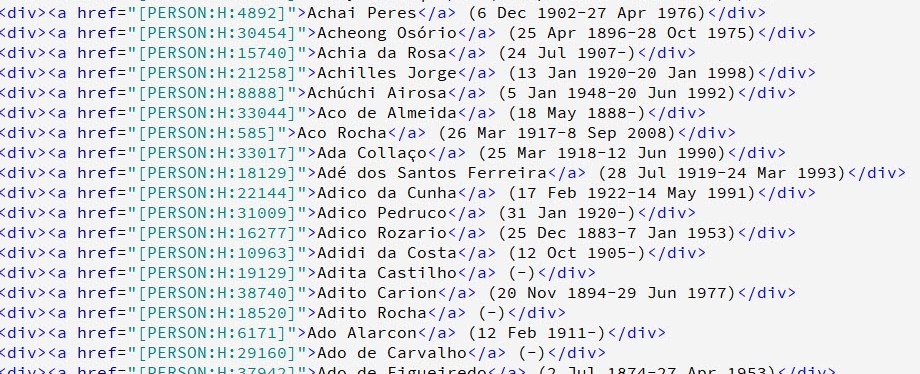
For the specialist: the list of nicknames shown here is coded in HTML and includes links to personal pages.
Updating the list of Nicknames
After adding a new nickname, the list of nicknames needs to be updated. Software has been prepared for this to be done with a few key strokes.
1. Extract all the nicknames from TMG as follows:
After adding a new nickname, the list of nicknames needs to be updated. Software has been prepared for this to be done with a few key strokes.
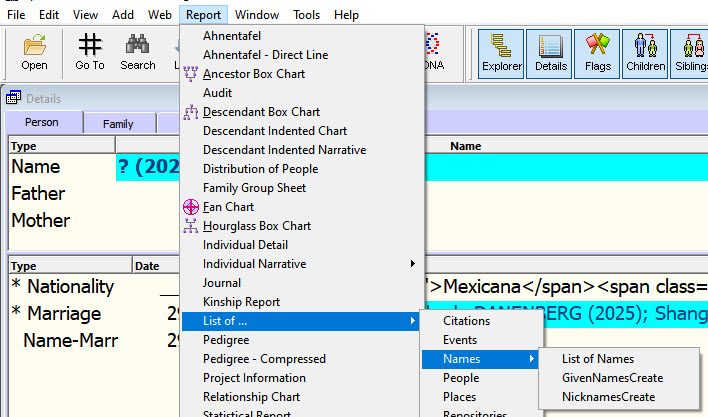
Click on Report>List of Names and from the pull-down list select NicknamesCreate to see the Report Definition Screen.
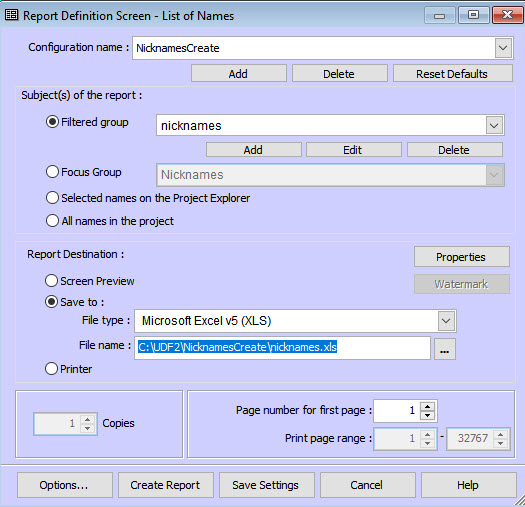
Enter the details as shown and save to C:\UDF2\NicknamesCreate\nicknames.csv. Read why not as .xls file?
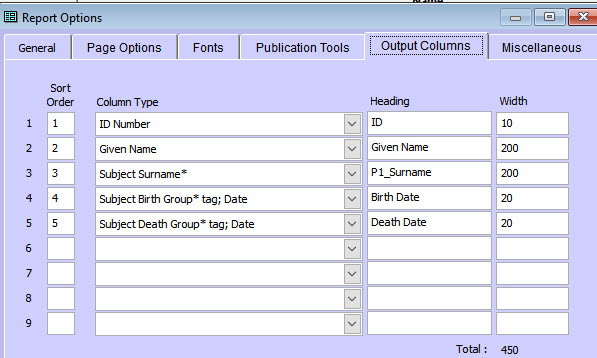
Click on Options>Output Columns and set up details as shown.
Click on Create Report.
If asked whether to overwrite a previous report, click Yes.
You will be asked whether to open the new file. Click No.
The list of nicknames downloaded from TMG will be in C:\UDF2\NicknamesCreate\nicknames.csv
2. Process the downloaded file of nicknames
(The program will run for some time, with progress annouced periodically.)
Search for the file called NicknamesCreate.xlsm. It should be in C:\UDF2\Nicknames_Create. Open it.
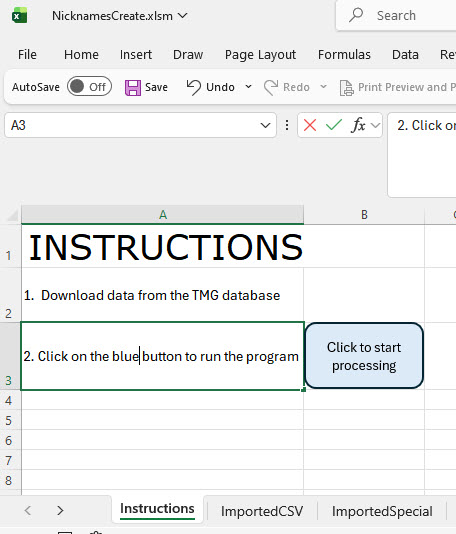
On the bottom tab, click on the Instructions worksheet and then on the blue button.
You will be taken to C:\UDF2\Nicknames_Create and asked to select the source file; select nicknames.xls.
Next you will then be asked to choose a file; select SpecialNicknames.xlsm.
You will then be asked where to export the results; navigate to the folder C:\UDF2\uiFiles\UserItems.
The software does all the work to create the HTML coding. The results will be in the file Nicknames.htm which should be in the folder C:\UDF2\uiFiles\UserItems. You need do nothing else; however, for the record, the coding to do this has been placed in a file. See details.
Update the website
1. Make the site using Gedsite
The modified Nicknames.htm file needs to be uploaded to Gedsite and the site is made using Gedsite.
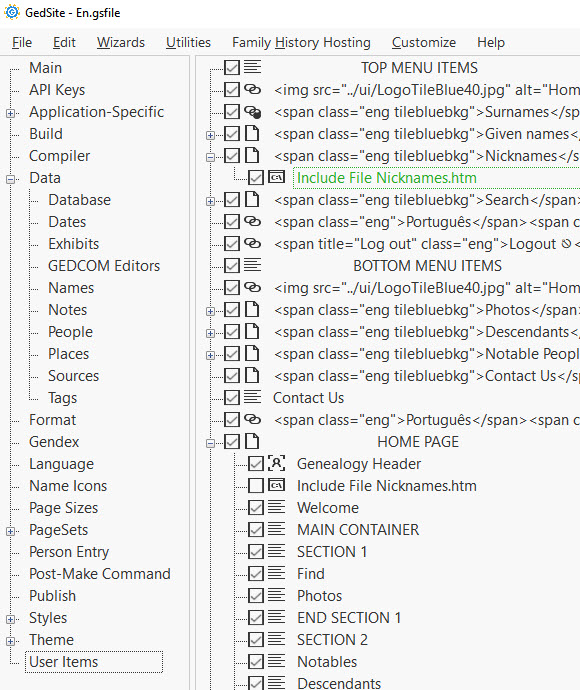
In Gedsite>User Items in the TOP MENU ITEMS, find the Edit Include File item named Include File Nicknames.htm, double-click on the File icon and navigate to C:\UDF2\uiFiles\UserItems and select Nicknames.htm.
Click OK and then File>Make Site (or CTRL-M).
Click on File>Browse Site (or CTRL-B).
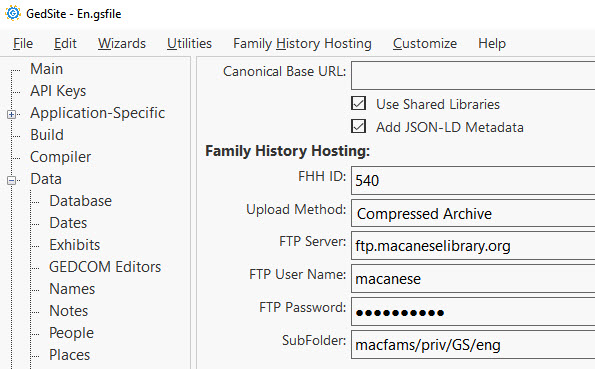
2. Uploading to the website
Click on Gedsite>Publish; make sure the parameters in the fields are what are shown in this image.
Click on Gedsite>Family History Hosting>Publish>OK and wait patiently for many minutes.